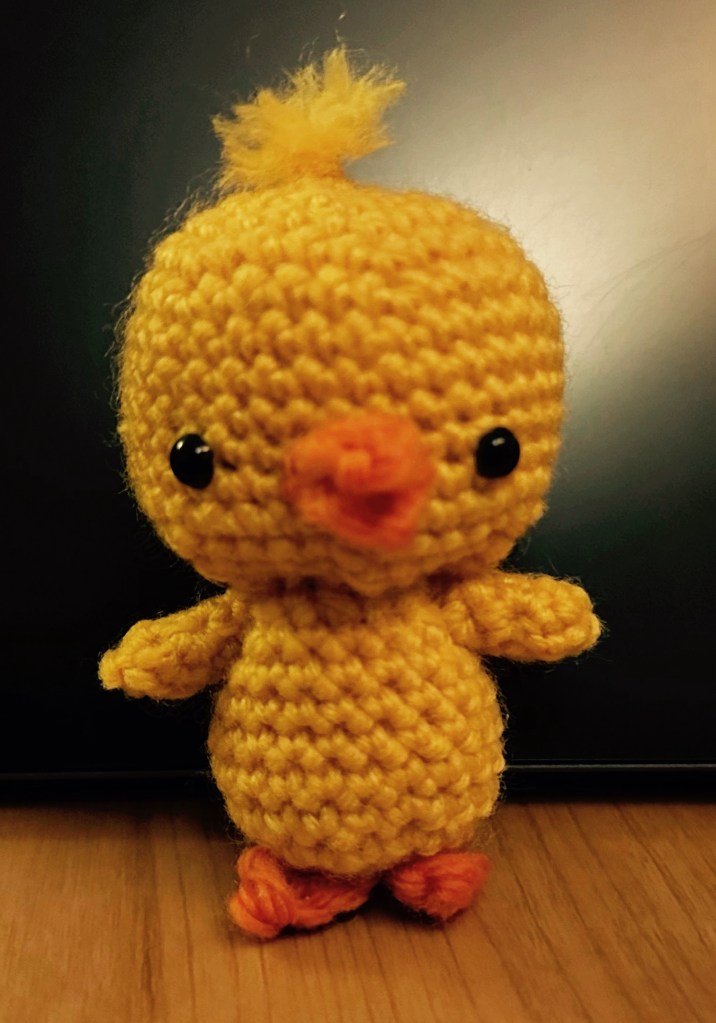
I’ve noticed my baby girl has loved little yellow chicks for ages now and I’ve been wanting to make her one. I finally found a pattern I liked and got around to making it!
Chickedy Chick
The pattern is from Etsy by TheresasCrochetShop. Super recommended the pattern, really easy to follow and clear instructions. I’ll most definitely make a few more for Easter next year!
Made using just scraps of leftover yarn I’ve had free with magazines over the years. DK acrylic and using a 4mm crochet hook.
Three years ago today, in March 2020, I started making an English Paper Piecing (EPP) quilt using a pack of fat quarters I bought on eBay a while back. It’s honey bee themed, which I thought was great for the hexagon design I wanted to try.
I’ve made quilts before but never tried EPP, which I learnt about from a friend I used to work with. It’s a slow meditative process and feels more about the journey than the actual destination.
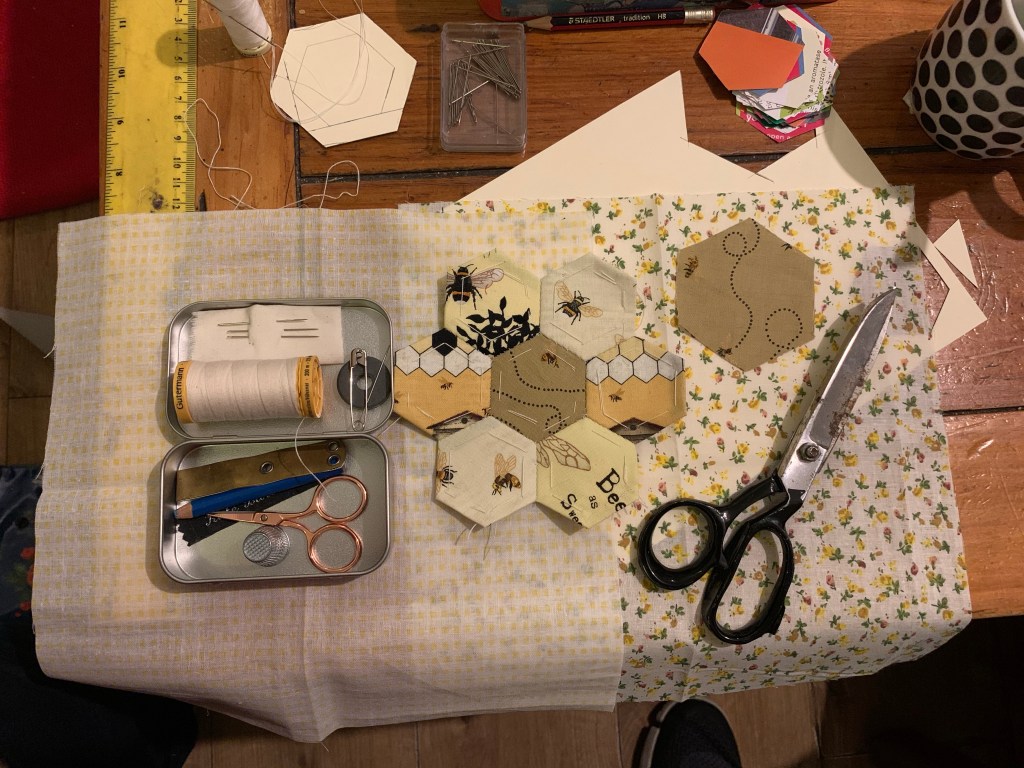
My initial set up just making a sample to see how it works.
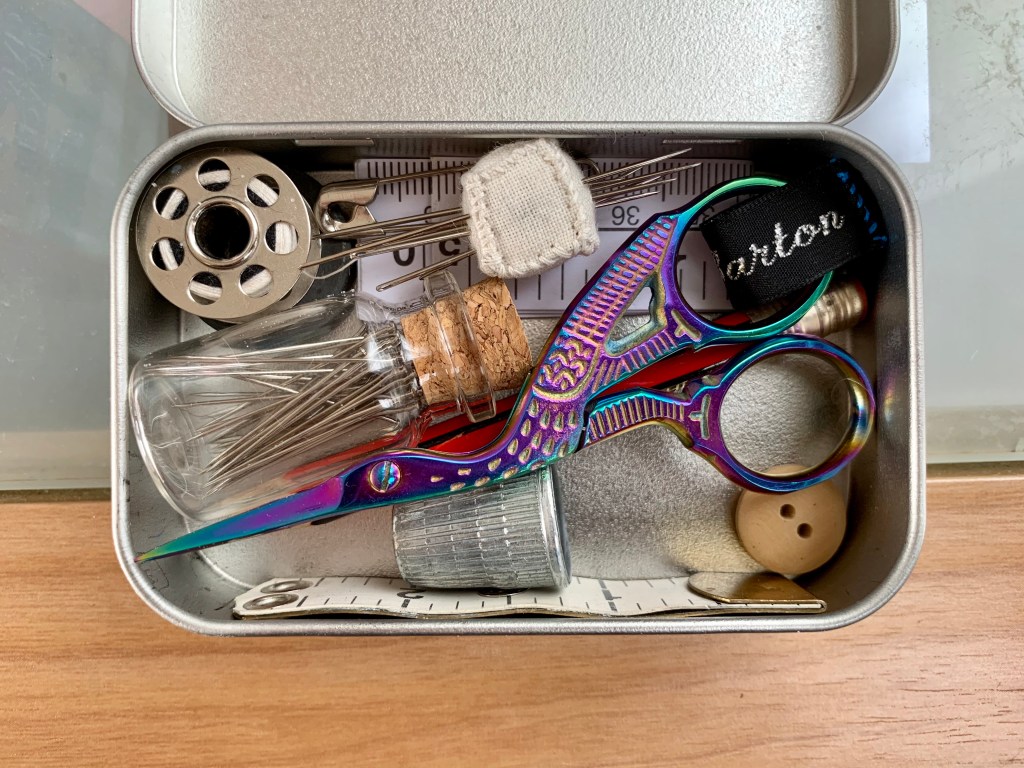
My tiny sewing kit I put together. It’s got everything you need on the go inside a tin the size of an altoid mint tin:
Thread on a bobbin (to save space)
Mini Scissors
Tiny pin cushion with needles
Jar of pins
Tiny Pencil
Paper tape measure and the metal end of a broken tape measure 2 1/2”
Safety pin
Button
Thimble
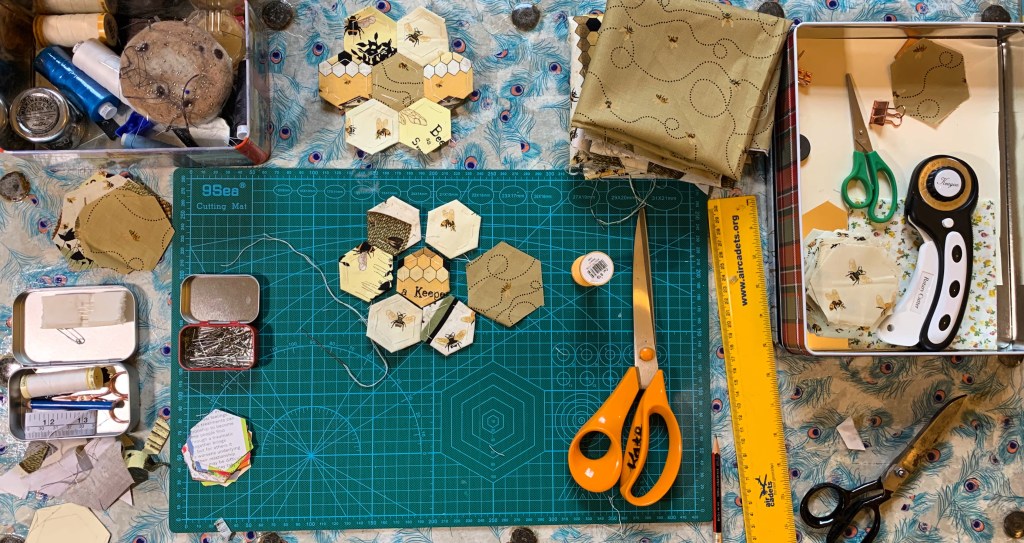
Making more…
The process of making an EPP quilt is very straight forward and I find quite relaxing. It’s got a few steps so you can almost set up a little production line, so once you have enough you can move onto the next thing, and if you get fed up with that you can go back and repeat the first few steps.
Step One – Chose your design
This step goes hand in hand with picking your fabric. I already knew I wanted to use hexagons just because I really like the look of them, they are classic and are really effective at creating interesting patterns. So it made sense to me to chose some bee print fabric. I bought my fabric on eBay, I just bought a pack of fat quarters, making sure they were 100% cotton.
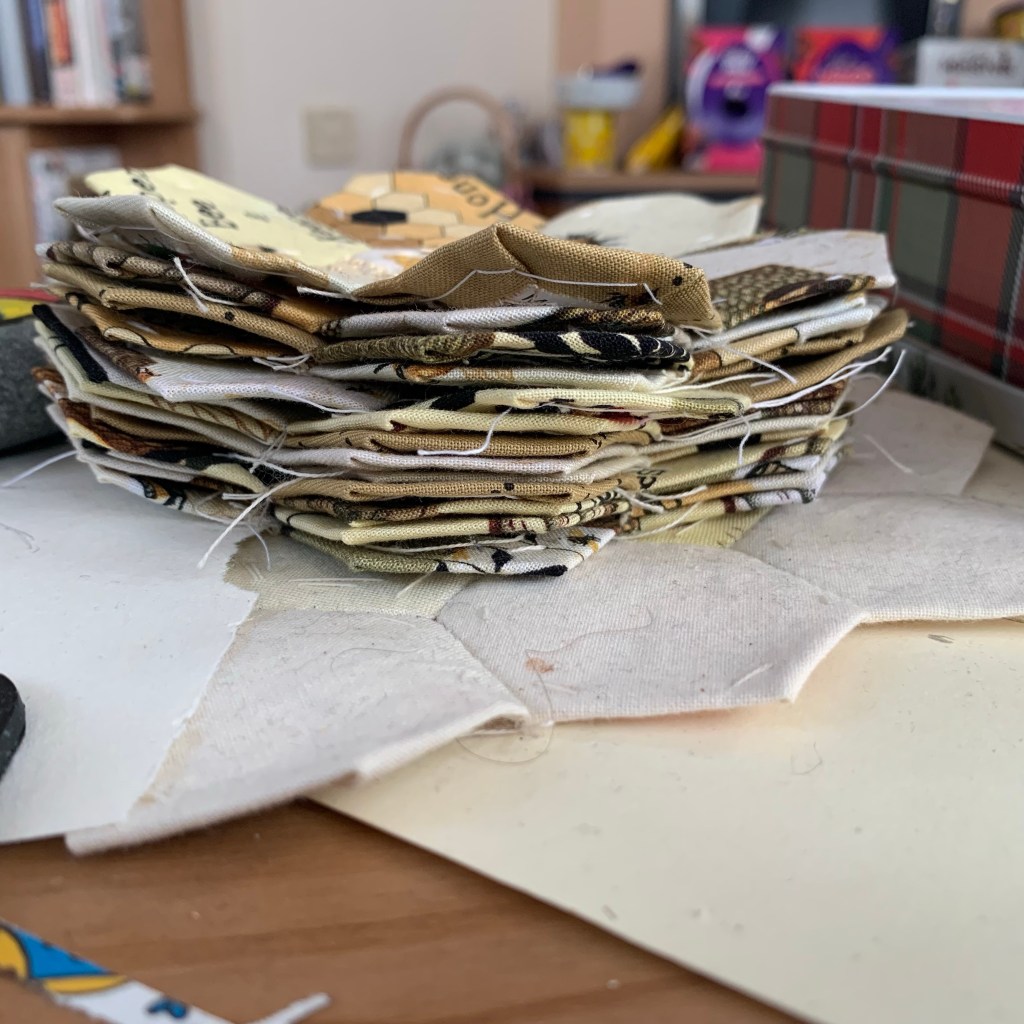
Step 2 – Cut out lot (Like hundreds!) of Paper Hexagons!
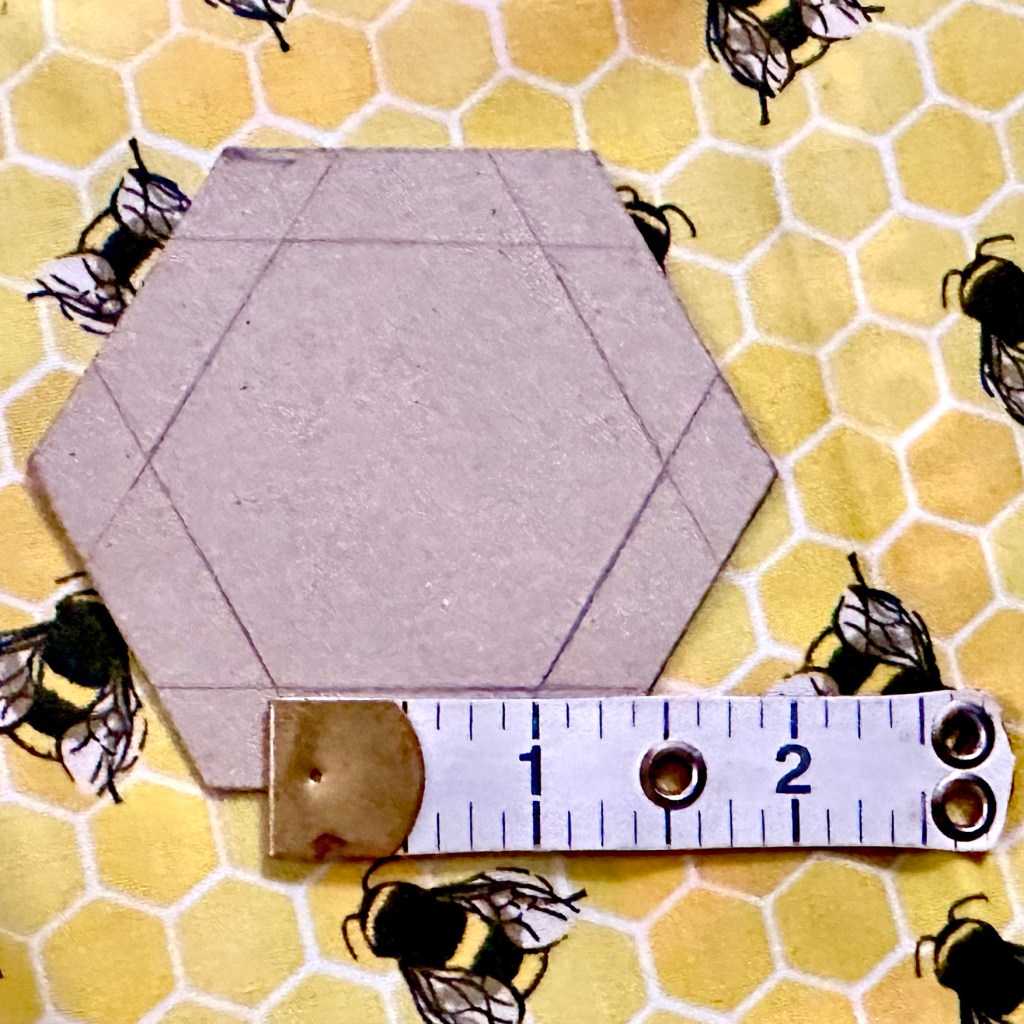
The internal measurement is the finished size of the hexies, so the size of your paper pieces, and the external measurement is the size you need to cut the fabric pieces. I left a 1cm seam allowance.
I’m making 1inch hexagons, so I made a cardboard template to draw around and cut out, but quickly lost the will to live.
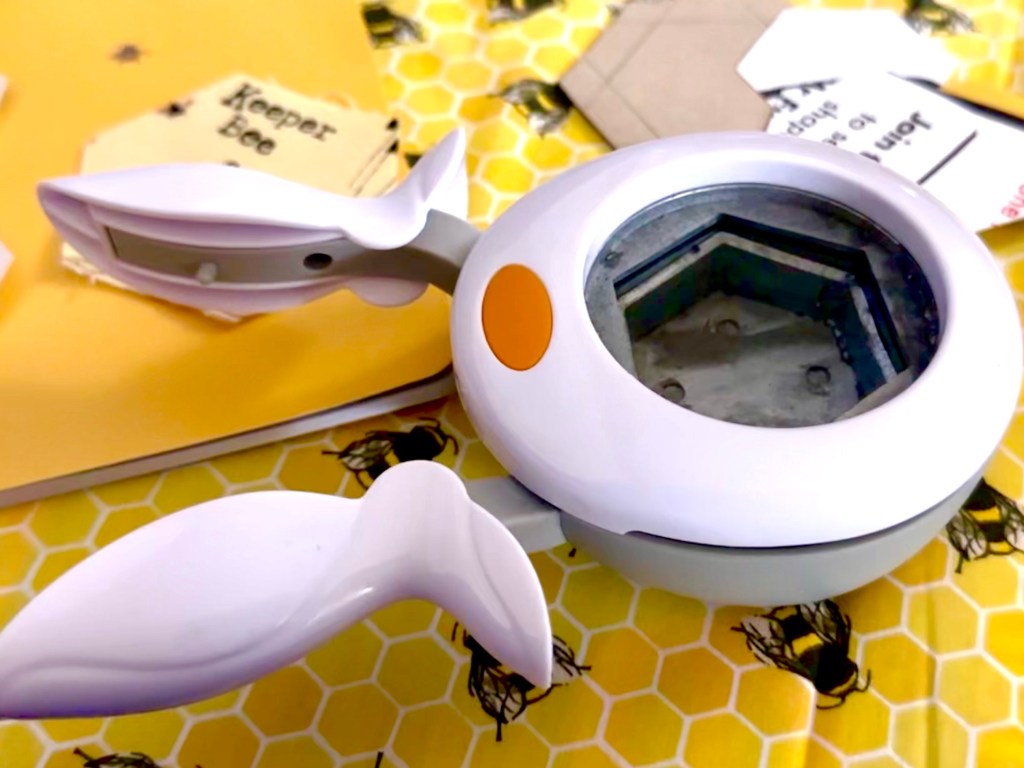
So I bought this… Its a Fiskars 1” hexagon hole punch!!!! It literally saved this project and I 100% recommend getting one to save you cutting individual paper hexies. Here’s a link to them on amazon.
I used the kids old magazines , they were slightly thicker than normal magazine paper and matte so they worked really well and the punch can cut through about 4 layers at once (with a bit of force 😬) which really saves time.
Step 3 – Cutting your fabric hexagons
Yep, as it says on the tin really. You can either try to make the most of your fabric and cut your hexies as efficiently as possible OR you can be more fussy and cut more strategically so you get your hexies looking exactly as you want them. It depends on your design. I’ve done a bit of both but I’ve mostly been trying to be as efficient as possible.
Using the piece of cardboard I draw all my hexies out on my fabric just using a normal HB pencil. You can also just cut squares and trim the excess later, but again, I’m trying to use my fabric efficiently. This image is a still from a video I made at the beginning of my process, linked below.
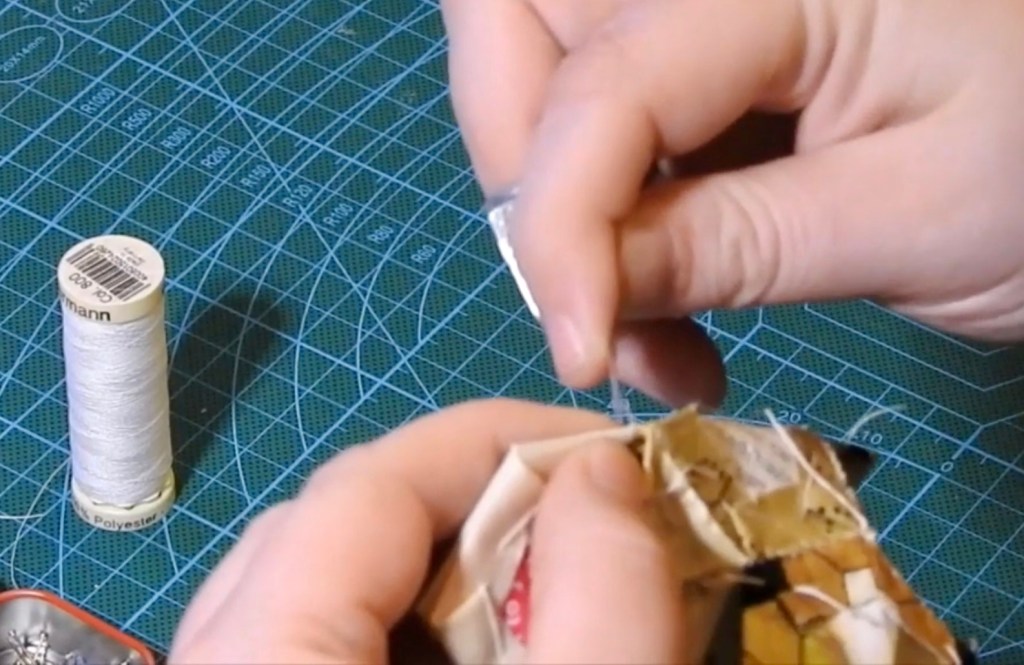
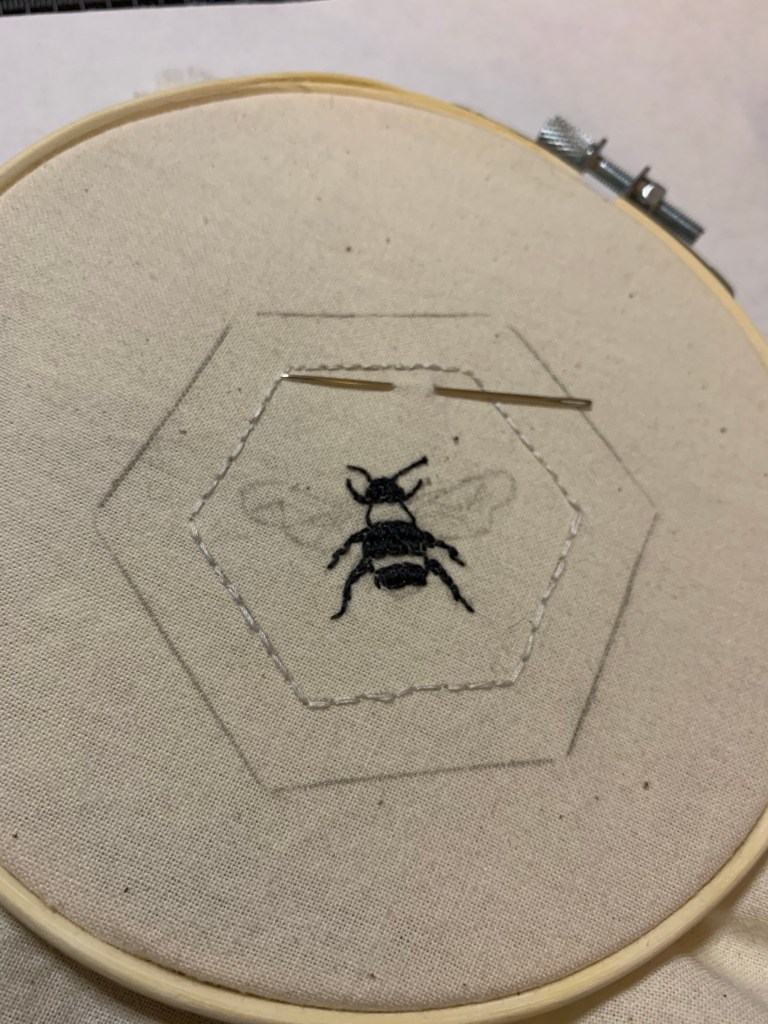
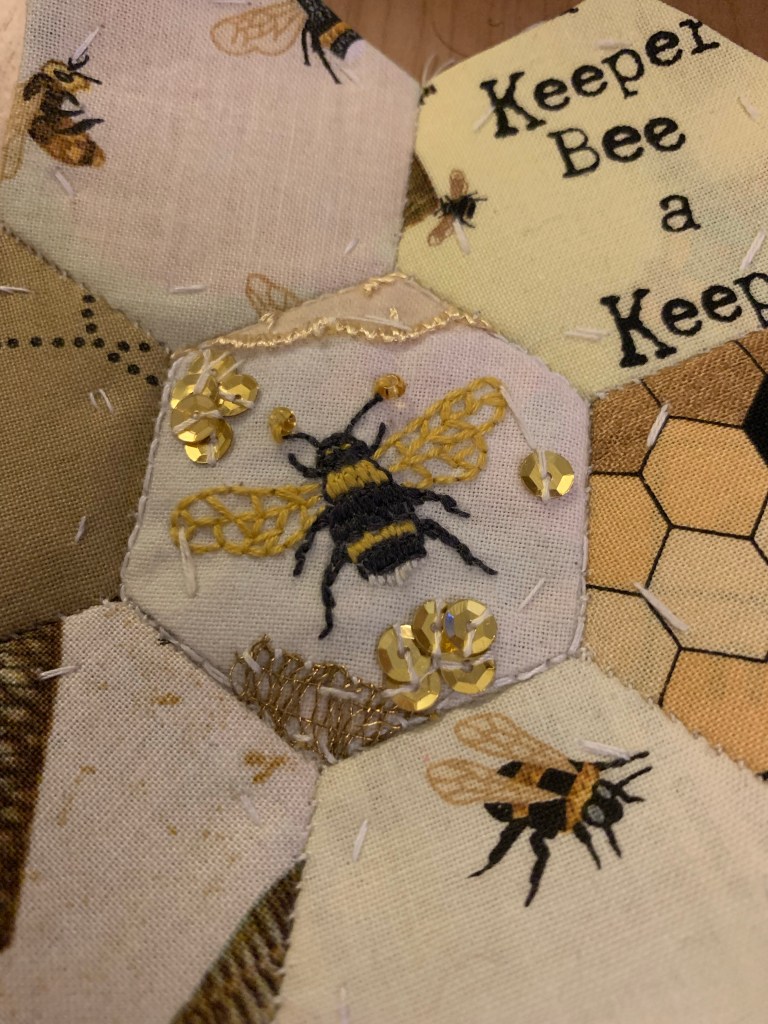
This is just an example of one the more special hexies I’ve included in my quilt, an embroidered bee on calico.
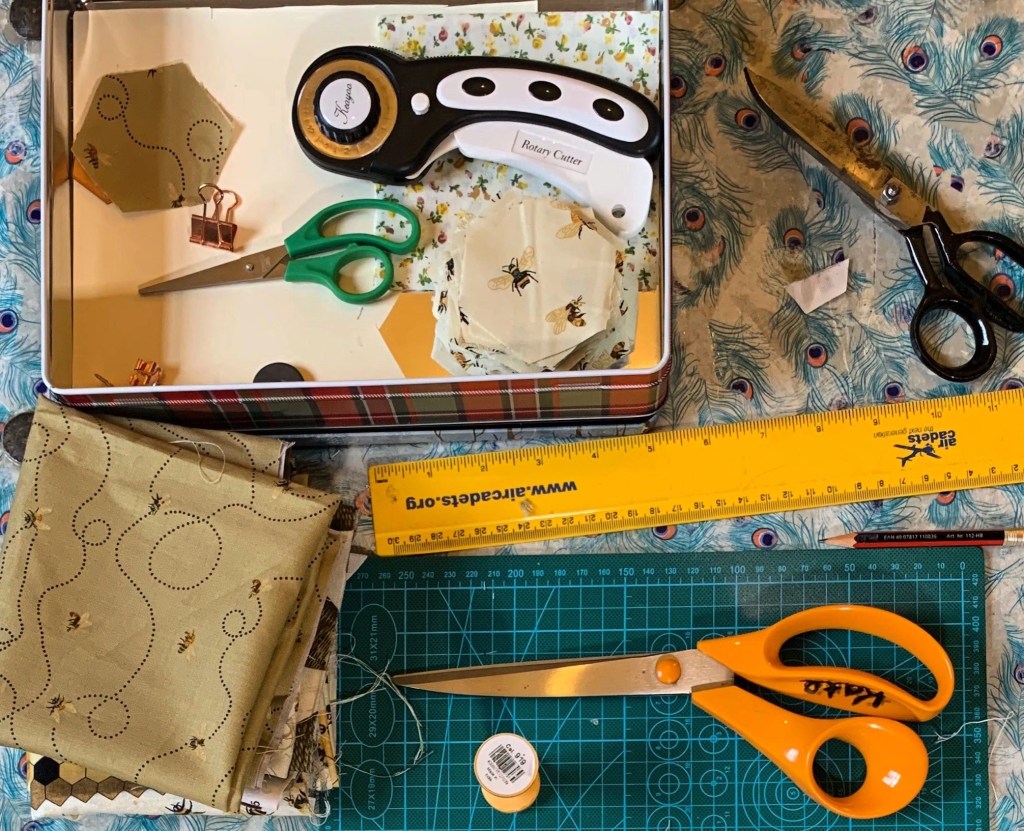
You can cut them anyway you like basically. I started using a rotary cutter and mat but quickly reverted to my scissors. If you’re cutting squares or strips I’m sure using the rotary cutter is easier then. Whatever you find easiest.
Rotary cutter, scissors, mat, fabric bits and bobs.
Step 4 – Tacking/basting/gluing Your paper pieces to your hexies
I have preferred to tack my hexies around the paper pieces. I used clips to hold the folded 1cm of seam allowance around the paper, then tacked them in place using tacking thread. At first I was going all the way through the fabric and paper but realised it would make it difficult to remove the paper, tacking and it was taking longer. So now I do a sort of herrringbone tack around the seam allowance holding them in place without going through the paper.
You should be able to see a few examples of how I tacked the seam allowance in this pic.And here you can see I was still going all the way through the layers. Avoiding this does make it a lot easier.
Many people also use fabric glue to secure the seam allowance to the paper pieces, but I haven’t got much experience with that. I know some people do find it quicker and easier, especially if you struggle with tacking or just want to speed things along!
Step 5 – Sewing your Hexies together
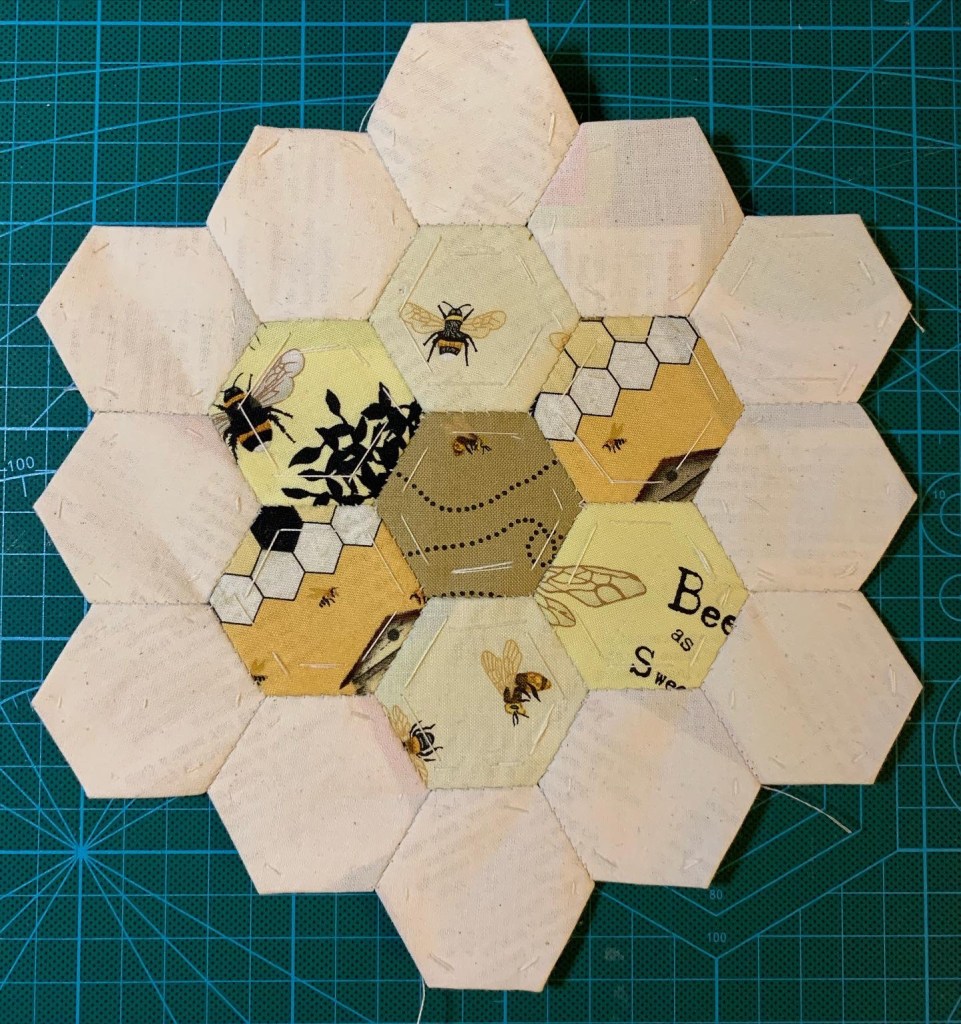
Once you have enough hexies you can sew them together! I made a sample first to try it out and see what I thought about it.
1st Hexi flower completed
In my YouTube video I start to sew together some hexies at about 42 minutes and have an explanation as to what I’m doing there.
Basically you put the right sides of your hexagons together, and do a whip stitch along the edge of the hexagon. You only need to pick up a small amount of fabric from each hexie for it to be secure. Work your way along the edge, until you get to the end, now either tie off your thread or add another hexie and continue until you’ve added 6 hexies around the outside of your central hexie. Then using the same tequnique sew each of the 6 outside hexies to each other, working out from the central hexie.
I tend to use gütermann polyester thread, doubled up for strength and I always use beeswax to help avoid tangles and to further strengthen the thread. Also, I can’t emphasise enough using a thimble! It took me a long time to get into using thimbles, but they are essential. It’s important to find one that fits your finger, it makes sewing so much easier.
Viola!! You’ve got it!! Now I used calico to go around the outside of my hexie flower and have gone from there. But that’s the basics. You can just use any inspiration now and crack on.
And just give in to the fact this is not going to be a quick project. I’ve been picking it up and down whenever i have time to work on it. It was right at the start of lockdown I first started it, when everything was on hiatus. Since then, I finished my degree, started a new job, had another baby!! 😱 Life is chaotic but you can just pick this up whenever you have chance. Make a few hexies, put it back down for a while. Don’t put any pressure on yourself to complete it. It’s a nice relaxing project that will keep you going for years.
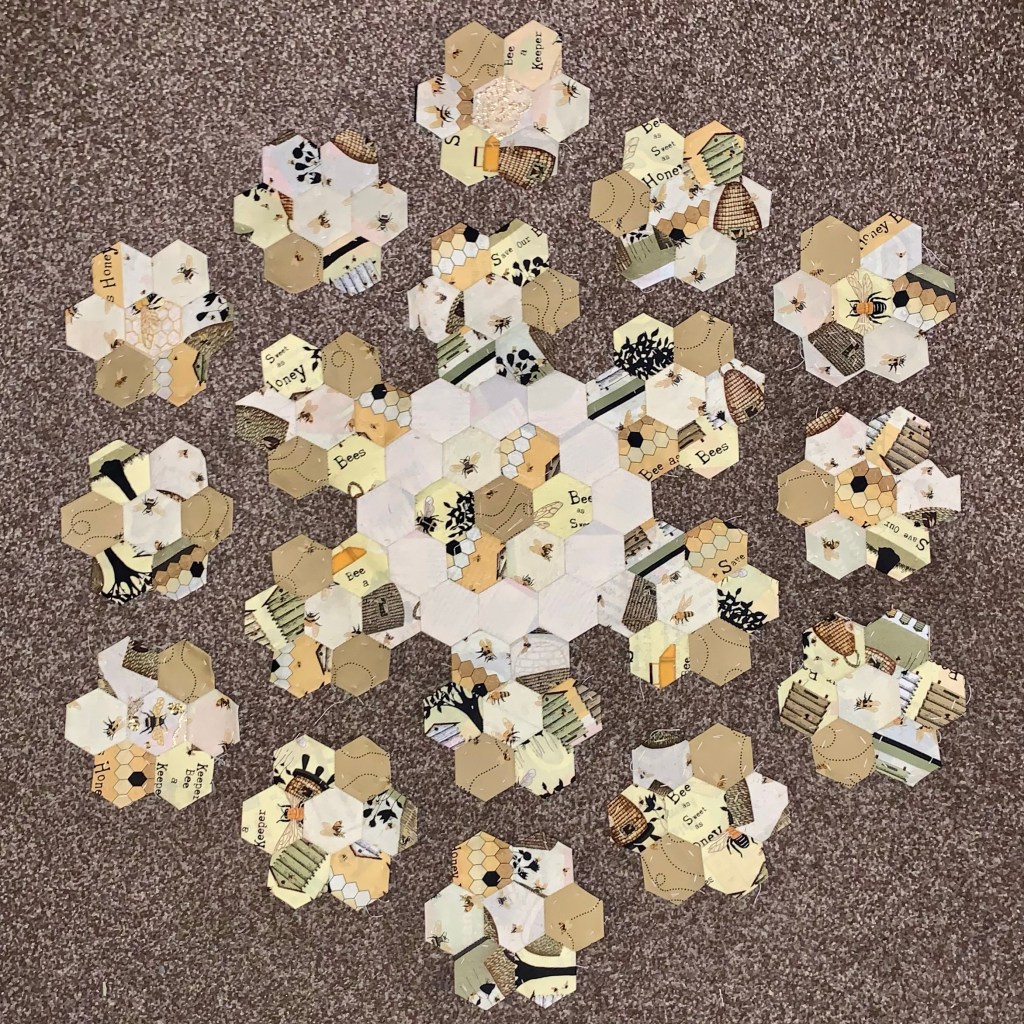
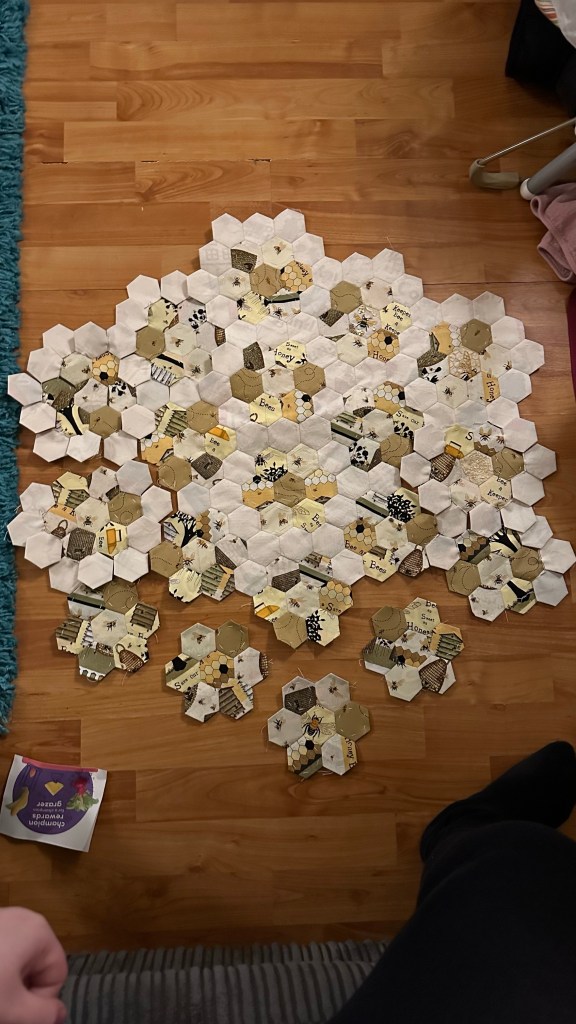
My EPP quilt so far, click thumbnails for a closer look.
A long slow-TV video I made of me just following the process. This was right at the beginning, when I first started making hexies for this project.
I hope you’ve enjoyed a little look into my process of making an EPP quilt so far. I’m sure there are more in depth tutorials and people with far greater experience in quilt making. But using my skills acquired from many years of sewing both as a hobby and professionally I can say I’ve really enjoyed the process so far and I’ll try to keep this blog more up to date
Theres lots of great communities online, on facebook for example to gain inspiration and support, so they’re definitely worth checking out.
As I hinted above, I’ve had a bit of a bonkers few years and had an extreme change in careers which I may go into in another post at some point. But just to share and hope you have a go at EPP too.
I’ve made a few policy and payment updates on my etsy shop to make payment easier, and you can now request custom made items! Hooray! Please take a look. Many thanks 😘
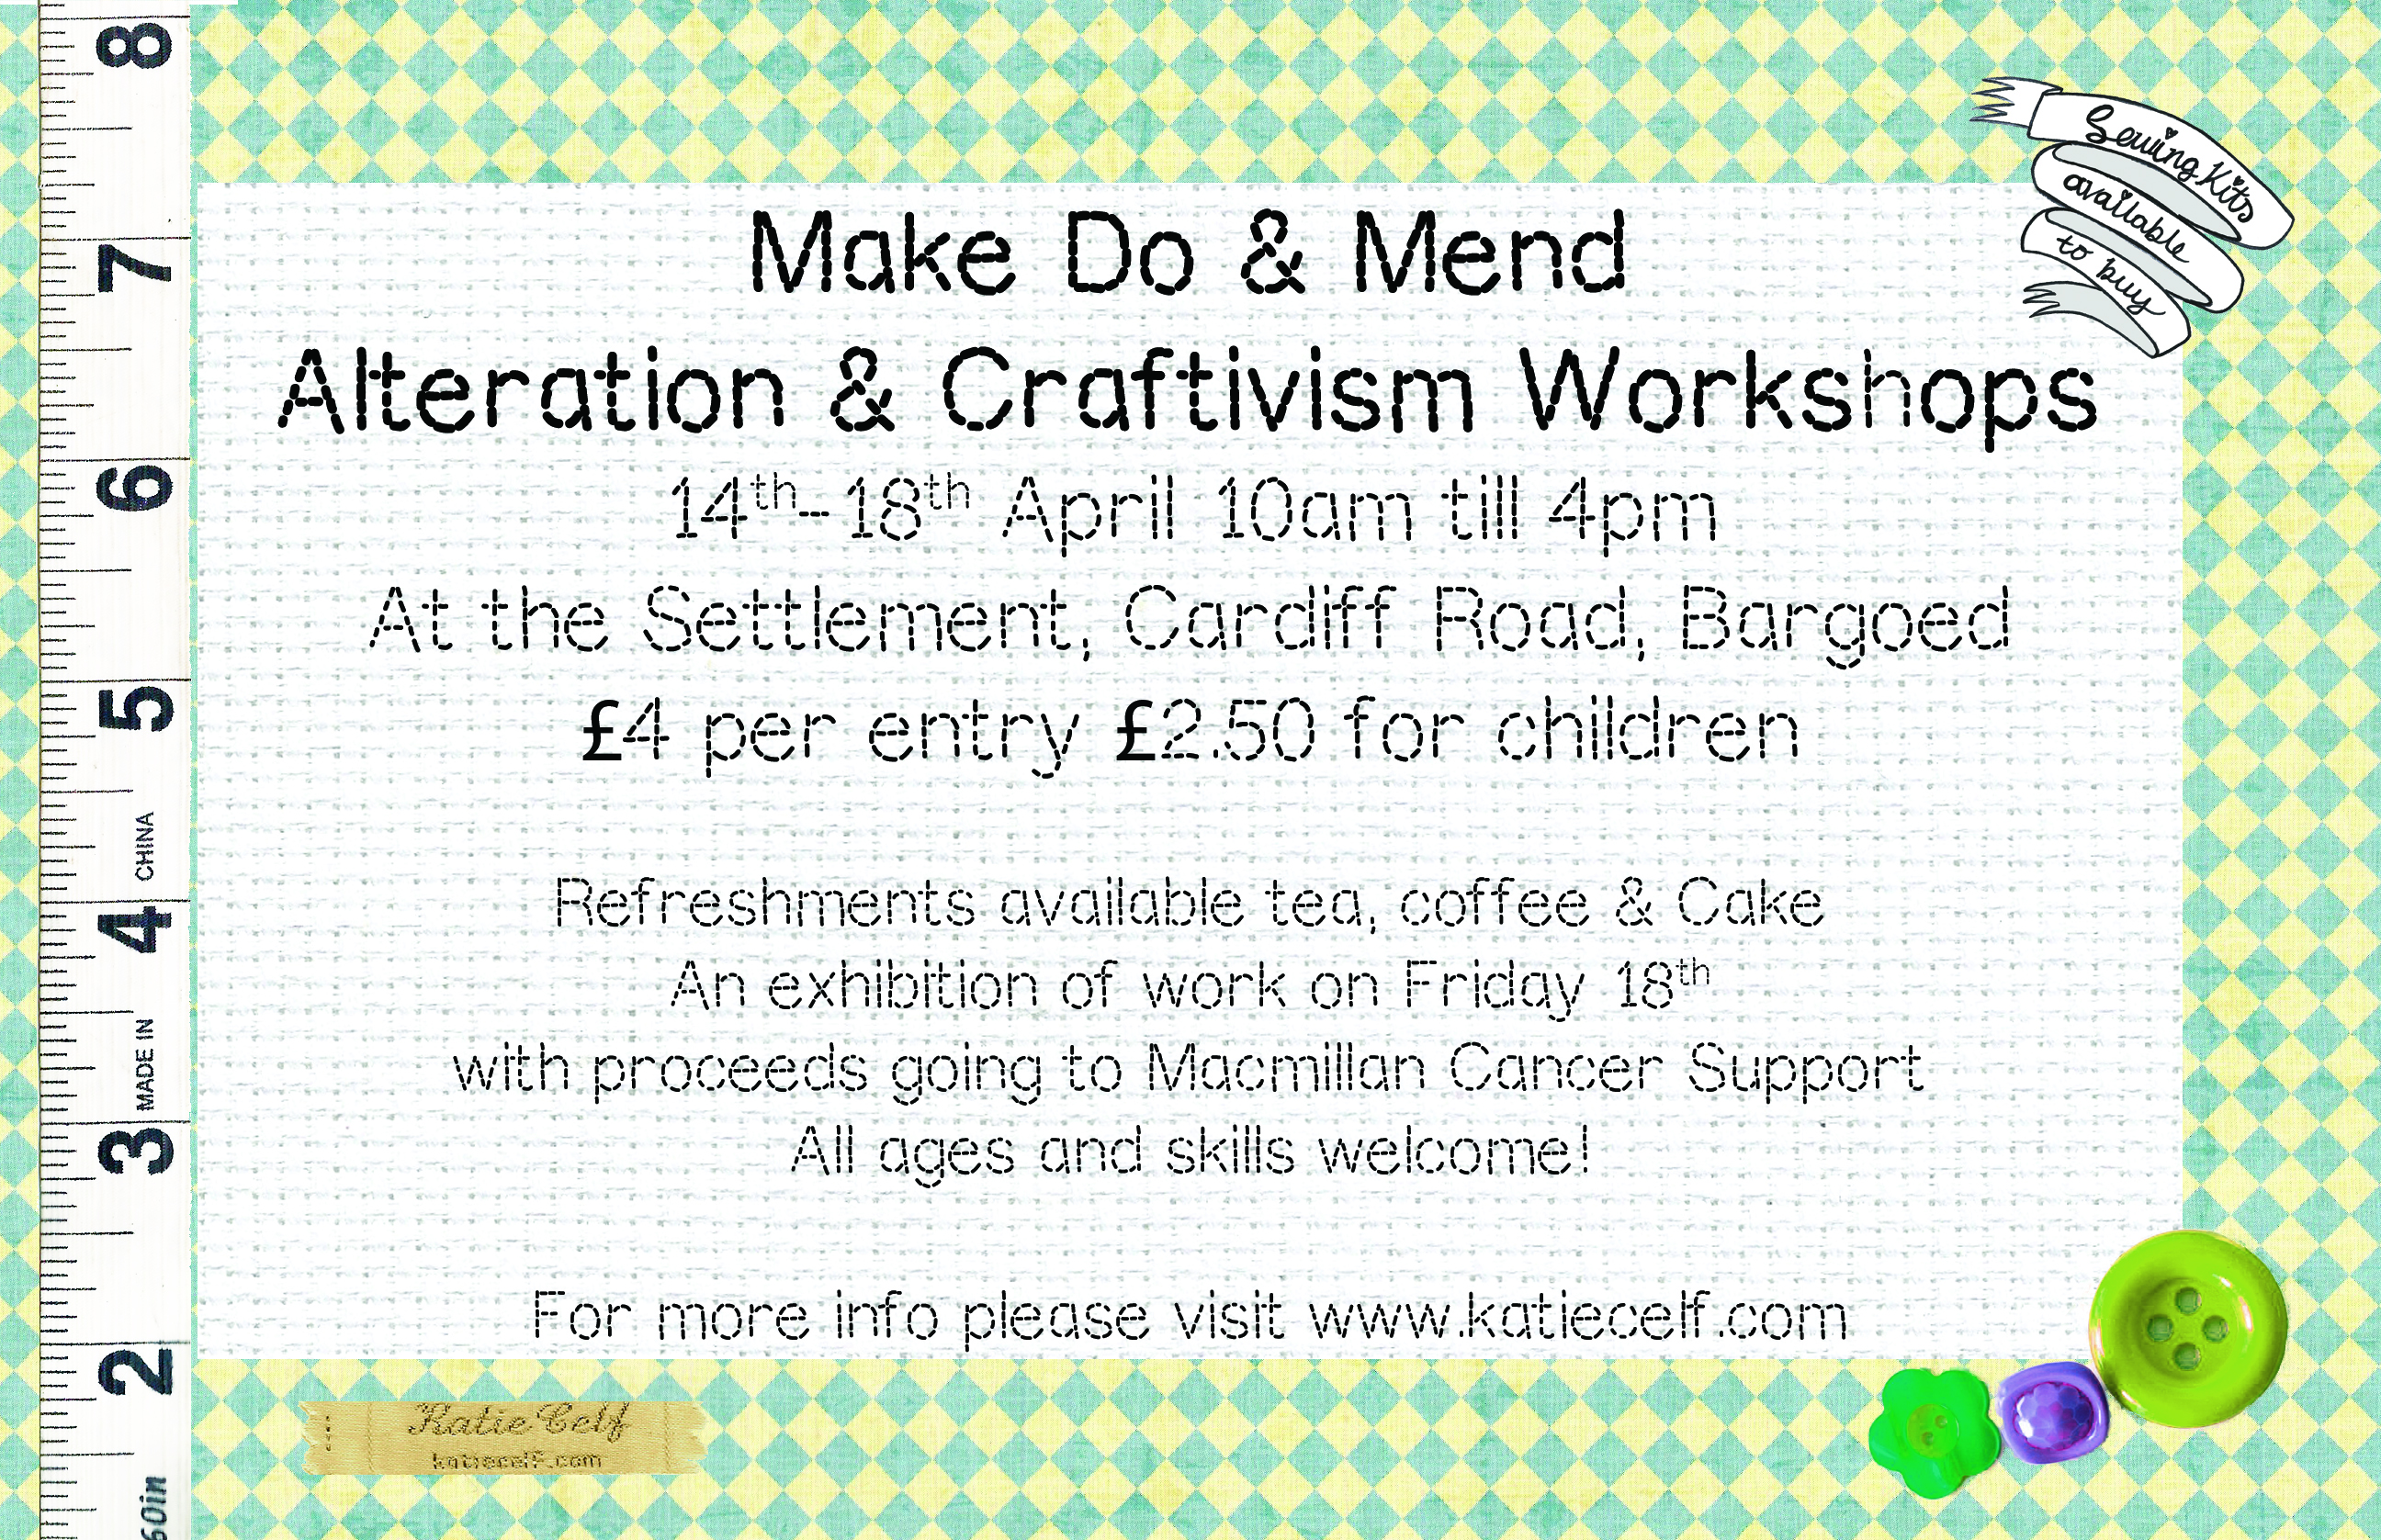
Through the Easter holidays, we’ll be holding drop-in sewing workshops at The Settlement on Cardiff Road in Bargoed between the 14th and the 18th of April 10am till 4pm.
Make Do and Mend Alteration drop in
“Make Do and Mend”
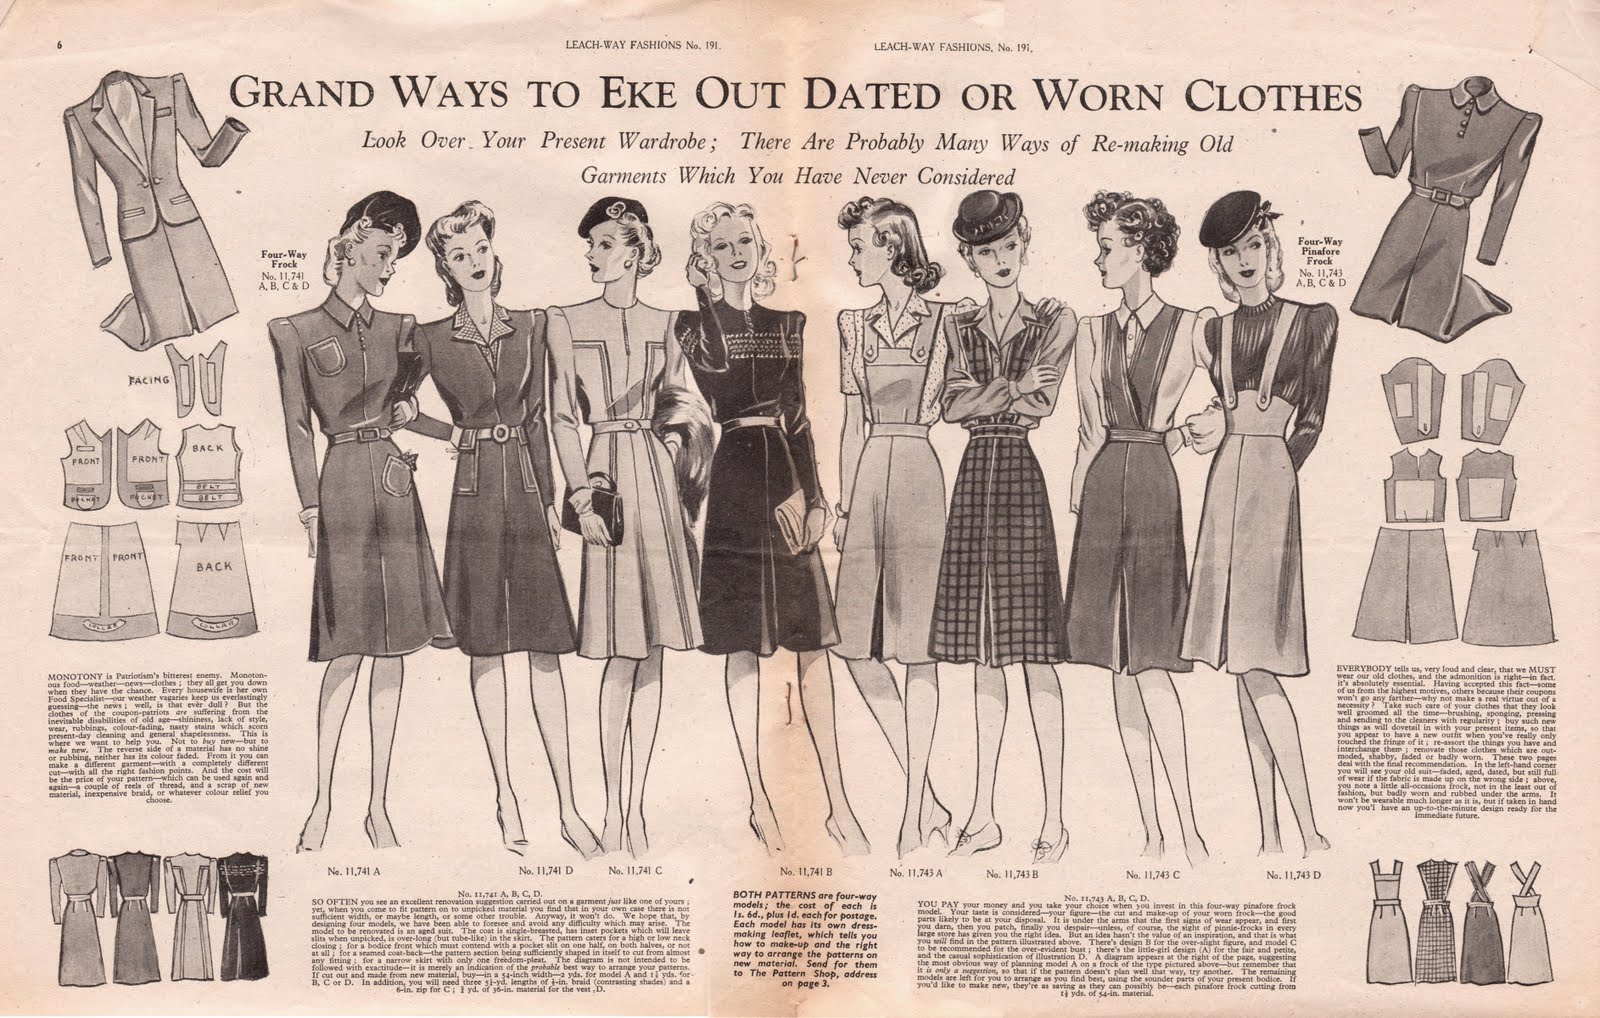
Make do and mend was part of the WWII ethos, between rationing and lack of production everyone just had to make do. Trying to get the most out of everything they had. Patching trousers, darning socks, re-knitting old jumpers into something new, anything to make clothes last as long as possible!
Today, we can reinvent the Make Do and Mend mentality to suit our modern needs. Especially now, with cuts, price rises and austerity, make do and mend is making a comeback in a big way! Upcycling is the new fashionable way of making do, using really creative innovative techniques to revive old items!
For this drop in session, you are welcome to bring along any old item of clothing and learn the basics of altering and reviving old clothes. If you need to take in, let out, take up, patch repair or customise. The world is your oyster! Don’t worry if you think your sewing skills aren’t up to much, learn some basic skills while you’re here.
“Craftivism is a way of looking at life where voicing opinions through creativity makes your voice stronger, your compassion deeper & your quest for justice more infinite. “
– Betsy Greer
Basically Craftivism is a way of raising awareness for a cause you feel strongly about, whether it be littering, cuts, social justice, or feminism – anything you care about.
For this workshop, I’m inviting the community of Bargoed and the Rhymney Valley to have a say on what you feel passionately about, whilst learning a new skill and having some fun! At the end of the Easter Holidays there will be an exhibition of some of the pieces of work we’ve made at The Settlement to show off the incredible work I’m sure will be produced and hopefully raise some money for charity.
If you would like to take part in the Craftivist workshop, some materials will be supplied, but if you would like to be more creative please bring along anything you wish to customise your piece.
Hopefully, there is something for everyone here! All ages and abilities are welcome to attend, and as its a drop in session you can stay for 5 minutes or 5 hours, its up to you.
There will be sewing machines available to use, although only a limited number so availability will be on a first come first serve basis. You can also bring along your own machine to use. There will also be a limited supply of haberdashery so if you require anything specific for your project please bring what you need, thread, pins etc…
To take part the cost will be £4 per person, £2.50 for children (under 16). Refreshments will also be available, tea, coffee, cake etc…


You must be logged in to post a comment.